Hello everyone!
First, I wanted to say hello to my new followers. I'm really glad that I got the chance to see so many great blogs. I love finding new nail blogs and seeing everyone's creations! So hello to you all.
Today, I have another nail art for you. For some reason, after finishing my nail wheel the other day, I've had all these nail art ideas in my head but that's a good thing though!
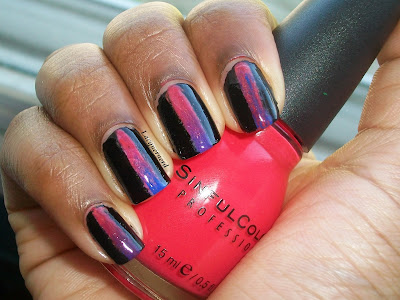
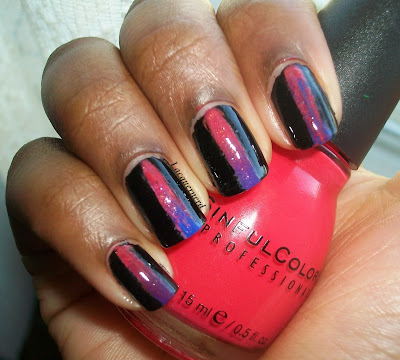
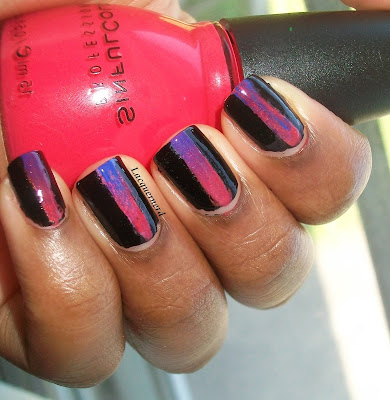
I did a gradient stripe over Sinful Colors Black on Black. It looks so cool and it's pretty simple to do. Let's get to it!
Colors Used:
Sinful Colors Black on Black
Sinful Colors Cream Pink
Sinful Colors Sweet Tooth
Sinful Colors Endless Blue
Sinful Colors Energetic Red
Before you even start painting your nails, you want to get your materials out first. You'll need tape and some makeup sponges. Getting these out first will cut down the time and you won't mess up your nails in the process of getting them.
To achieve this look, I first painted one coat of Sinful Colors Black on Black as my base color. Once the black is completely dry, get your tape and pat it down on your hand a few times to make it less sticky so the polish doesn't stick to the tape.
Then, line the pieces of tape on your nails so you'll have a line in the middle of your nail. It doesn't have to be perfect and you can do this with any kind of pattern that you want.
Next, grab a makeup sponge and paint your colors onto it. Then, dab the colors onto your nails. You're going to want to sponge it on a few times so that the color is opaque enough (I did about 3-4 dabs with the sponge to give you an idea).
Finally, peel the tape off and finish off with a top coat to bring out the gradient and blend the colors in together. If you have any polish on your fingers, grab a Q-tip and clean up any polish.
Also, if you make any mistakes such as some of the stickiness from the tape is on the nail, you can just paint a thin coat of black polish to cover it up. If it's the gradient, you can lightly dab whatever color you need more of onto the stripe to even it out.
It's a pretty cool and simple design to do! I messed up a few times, but it was nothing too serious. Even if the colors aren't perfectly sponged on, it still comes out good!
What do you think of this design?
Until next time!
Thursday, August 29, 2013
Wednesday, August 28, 2013
Liebster Award!
Woah, I got nominated for something? I never get nominated for stuff haha.
Anyways, I was nominated by Yeliza from Beacon Nails for the Liebster Award. Basically, it's an award for bloggers to nominate other blogs so they can discover more blogs. I think it's a great idea because I'm always looking for new blogs to follow! So, here are the rules:
- You must link back to the blogger who nominated you.
- Answer the 11 questions given to you by the blogger who nominated you.
- Nominate 11 other bloggers with less than 200 followers.
- Go to the blogs you nominated and notify them of your nomination.
- Give your nominees 11 questions to answer.
My Questions from Yeliza:
- What made you decide to start blogging? I decided to make a nail art blog because I love doing my nails and sharing my nail art with everyone. I like seeing my progress with my nail art as well. I was toying with the idea for maybe about a year because I didn't think that I was ready to make that step yet, but I'm glad that I finally did. I really love blogging about my nails.
- Who is the number one supporter for your blog? It would probably be a few of my closest friends. Whenever I post something new, they always check it out, or if I need them to look at something that I fixed they look at it.
- What kind of animal would you be? I would definitely be a cat hands down. I'm pretty laid back and independent like a cat. Plus my longing for world domination (XD).
- Do you have any hidden/special talents? I can roll my tongue into a clover shape, does that count?
- What is the first thing you notice about a person? Personality. If I don't like it, then I probably won't like you.
- If you could go back in time and change one thing what would it be? That's a good one, and I have a lot for that one. I would probably say I would change and make The Holocaust never happen as one of them though.
- What's your favorite season of the year? I like fall the most. It's not too hot and not too cold, the leaves are pretty, and my birthday is in the fall.
- If you could go anywhere in the world right now, where would it be? Japan or South Korea. I love the cultures and learning about them.`
- What's the best way into your heart? Food. Give me some good food and I'll love you forever.
- If you could spend a day with any celebrity who would it be? It would probably be either Dir en grey (my favorite band) or a member of a K-pop group, but it would be cool to spend a day with them.
- Do you have any guilty pleasures? I like anime a lot. I try to watch it as much as I can. Food is also a guilty pleasure. I'm always hungry and always eating.
I nominate:
Alaina from The Little Canvas
Jenny from Lavish Layerings
My Questions:
1. What made you want to start blogging?
2. Who is your biggest inspiration and why?
3. If you could have one food for the rest of your life, what would it be?
4. What's your favorite color?
5. What is your favorite design to do on your nails?
6. If you were to live the life of a celebrity, who would it be and why?
7. What are your pet peeves?
8. What is your favorite holiday?
9. What is your biggest fear?
10. What would you do for a Klondike Bar?
11. What is your favorite saying/quote?
If any of you accept the award, link me your answers so I can see them as well!
Until next time!
Tribal with Polka Dots Nails
Good afternoon everyone! How is everyone doing?
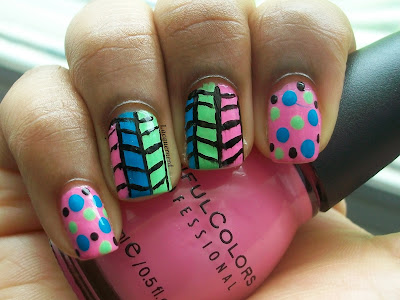
Today I have a colorful tribal mani for you. I've seen the design around Instagram and wanted to try it out. I also added polka dots to add a little more to it. I'm kind of upset that the design came out pretty good, but my top coat decided to streak some of the lines. It looks great from afar, but when you look closely you can see the streaks. Nonetheless, I wanted to post them because despite the streaks I still like it.
Colors Used:
Sinful Colors Pink Forever
Sinful Colors Pistache
Sinful Colors Why Not
Sinful Colors Black on Black
For the three base colors, I used the bottle brushes to paint three stripes. I used a medium brush to create the tribal pattern. Then, I used a big, medium, and small dotting tool to create the dots on the other nails.
It's a pretty simple tribal design. You can use any colors with it! I really want to try this again and see if the streaks come up, but for now I'm content.
What do you think of this design? What top coat do you all use? I need a new top coat!
Until next time!
Monday, August 26, 2013
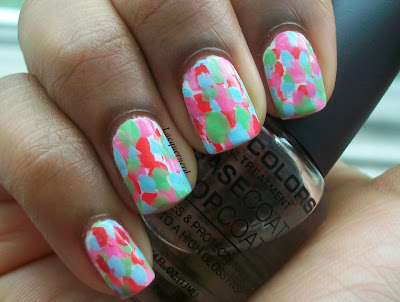
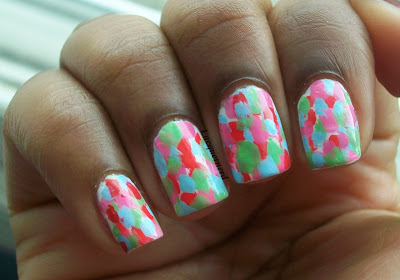
Abstract Dotticure
Good afternoon everyone!
I have a fun and easy nail art design that you only have to use the bottle brushes for!
I was working on trying completing a nail wheel yesterday to practice some designs when I did this one. I was just doing something random and testing out colors, but it turned out to be a really pretty and unique design. I call it "Abstract Dotticure". It looks like it should be a design on a nice skirt or something.
Basically, all you do is dab the colors onto the nail with the tip of the brush. You also want to be a little messy with it, it doesn't have to be perfect.
In my opinion, it looks better when you do small dabs instead of big ones, but the big dabs look just as cool too. Also, it doesn't really matter what order you dab the colors on, but it will kind of matter when you're trying to finish it off. Some nails will look like they have an even amount of each color on the nail and others won't. It's really up to the person though and how they want it to look!
Colors Used:
Sinful Colors Energetic Red
Wet n Wild's French White Creme
Sinful Colors Pistache
Sinful Colors Pink Forever
Color Club's Take Me to Your Chateau
What do you all think of this design? Liking the abstract look?
Until next time!
Sunday, August 25, 2013
I have Bloglovin now!
I just signed up for Bloglovin not too long ago, and I'm not really sure how it works yet. But, I have to paste this link in a blog. I'm hoping it will be a link to take you all there and see posts for the blog!
Edit: If you'd like to follow through BlogLovin, the button is on the blog right now. I'm actually really liking this site!
Edit: If you'd like to follow through BlogLovin, the button is on the blog right now. I'm actually really liking this site!
Saturday, August 24, 2013
Crayon Pop's "Bar Bar Bar" Inspired Mani
Hey everyone!
Today I have a quick and simple k-pop mani inspired by Crayon Pop's "Bar Bar Bar"! I absolutely love this song and it's been getting popular lately! It's so simple and infectious, I remember listening to it ten times straight one night. It's a really good song. If you're not a k-pop fan, I would suggest listening to this song. I've been meaning to do nail art for the video for awhile now but I got a little lazy haha.
I based my design on the helmet's worn in the video. To create this look, all you do is start off with two coats of white polish. Then, paint two straight lines in the middle of the nail with the colors of the outfits. Easy as that!
What do you think of this design? Have you listened to "Bar Bar Bar" yet?
Until next time! Check out Crayon Pop's video for "Bar Bar Bar" below!
Today I have a quick and simple k-pop mani inspired by Crayon Pop's "Bar Bar Bar"! I absolutely love this song and it's been getting popular lately! It's so simple and infectious, I remember listening to it ten times straight one night. It's a really good song. If you're not a k-pop fan, I would suggest listening to this song. I've been meaning to do nail art for the video for awhile now but I got a little lazy haha.
I based my design on the helmet's worn in the video. To create this look, all you do is start off with two coats of white polish. Then, paint two straight lines in the middle of the nail with the colors of the outfits. Easy as that!
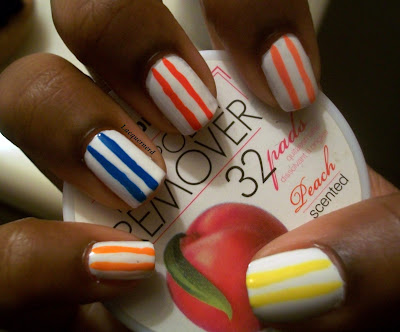 |
| From left to right: Sally Hansen's Sun Kissed, Sinful Colors Why Not, Sinful Colors Energetic Red, Sinful Colors Island Coral, Sally Hansen's Mellow Yellow |
Until next time! Check out Crayon Pop's video for "Bar Bar Bar" below!
Friday, August 23, 2013
Maybelline Polka Dot Collection Swatches+Review
Hello everyone!
Sorry for the delay in posts this week. Like I said earlier, I went to my friend's house this week and the lighting was kind of bad there and I couldn't get many good photos. I'd rather have quality over quantity any day.
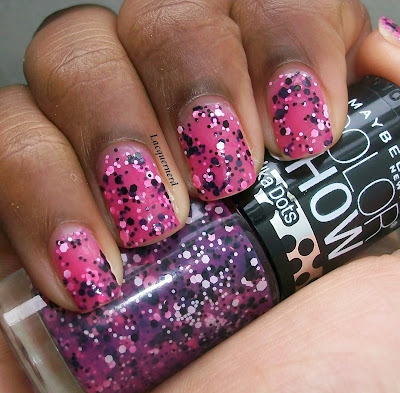
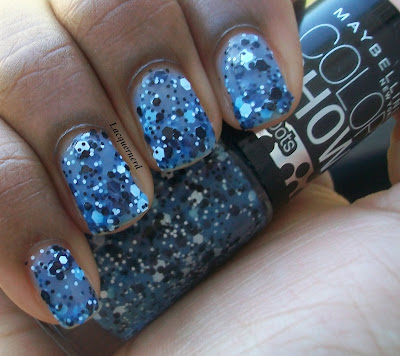
On the other hand, I have swatches of three of the new Maybelline Polka Dot Collection polishes. These polishes are jellies with black and white glitter distributed in it. I bought this at Rite Aid for $3.99 each. Not a bad price for polishes I must say! I only bought three colors because I wasn't really into the other shades that much. I'm contemplating buying the jade polish though. Let's move on with the review!
This is Pretty in Polka, a sheer candy pink with black and white glitter. I used three coats for this swatch using the dab and swipe method. With all of these, I would probably suggest using a creme polish and then layering the polish on. It looks great by itself though. The drying time was also very good with this one.
Blue Marks the Spot (such a creative name by the way!) is a sheer cerulean blue with black and white glitter. I did three coats of this polish and used the dab and swipe method as well. I had no problems with this polish as well, but I will say that it is very sheer for the first two coats. Once again, this would be best if you layered the polish over another blue polish, but it is pretty by itself.
The last one that I'm showing you is Clearly Spotted. Clearly Spotted is a black and white glitter in clear polish. This is one coat over several different colors. This could be considered a dupe for Hard Candy's Black Tie Optional, but I actually prefer this to Black Tie Optional and it's a little bit different. For one, it doesn't have the straight glitter that always comes up with Black Tie Optional. It has the hexagon pieces and the small black and white pieces, so I like that about this glitter.
Overall, these colors are absolutely amazing. The formulas are great, fast drying, and easy to work with. Granted with most glitters it can be a pain to take off, but overall these are great.
What do you think of these polishes?
Until next time!
This review was solely based on my honest opinion. I was not paid or asked to do this review for anyone.
Sorry for the delay in posts this week. Like I said earlier, I went to my friend's house this week and the lighting was kind of bad there and I couldn't get many good photos. I'd rather have quality over quantity any day.
On the other hand, I have swatches of three of the new Maybelline Polka Dot Collection polishes. These polishes are jellies with black and white glitter distributed in it. I bought this at Rite Aid for $3.99 each. Not a bad price for polishes I must say! I only bought three colors because I wasn't really into the other shades that much. I'm contemplating buying the jade polish though. Let's move on with the review!
This is Pretty in Polka, a sheer candy pink with black and white glitter. I used three coats for this swatch using the dab and swipe method. With all of these, I would probably suggest using a creme polish and then layering the polish on. It looks great by itself though. The drying time was also very good with this one.
Blue Marks the Spot (such a creative name by the way!) is a sheer cerulean blue with black and white glitter. I did three coats of this polish and used the dab and swipe method as well. I had no problems with this polish as well, but I will say that it is very sheer for the first two coats. Once again, this would be best if you layered the polish over another blue polish, but it is pretty by itself.
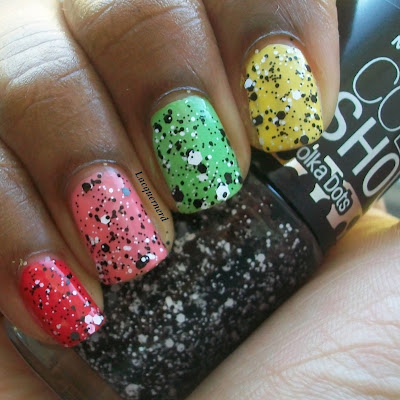 |
| From left to right: Sinful Colors Energetic Red, Sinful Colors Island Coral, Sinful Colors Pistache, Sally Hansen Mellow Yellow |
Overall, these colors are absolutely amazing. The formulas are great, fast drying, and easy to work with. Granted with most glitters it can be a pain to take off, but overall these are great.
What do you think of these polishes?
Until next time!
This review was solely based on my honest opinion. I was not paid or asked to do this review for anyone.
Saturday, August 17, 2013
Sinful Colors My Buoyfriend with Color Club Snowflakes Swatch+Review
Hello everyone!
I've been kind of lazy today. I didn't really do anything besides eat and sleep. I did watch some anime today on Hulu though. After this, I might watch some more episodes if new episodes are up of the ones I'm currently watching. Or I might choose a new one to watch. I've been dying to watch Bloodlad since it started streaming on Hulu, but I end up falling asleep. Oh well, we'll see.
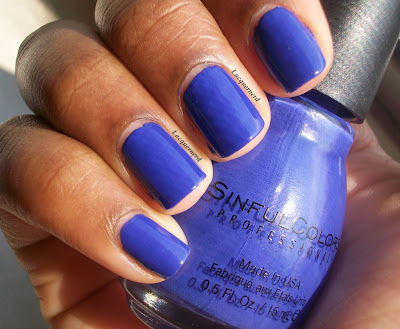
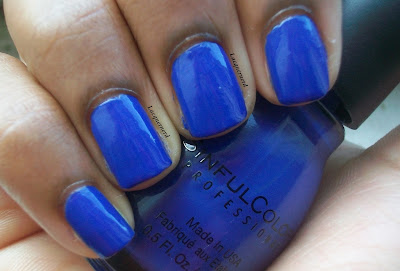
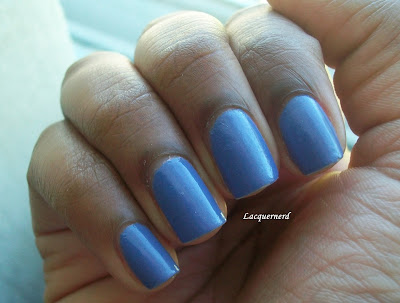
Anyways, back to nails. Today I'm showing you Sinful Colors My Buoyfriend. This is a blue/purple (blurple?) creme polish. I swear I move my hands a little bit and it looks like a royal blue. It's more purple in my opinion, but point still remains. The formula was good, but it was a little thick for me. The color is very opaque and I almost wanted to do one coat, but I decided to do two coats to be safe. It's a really pretty color though. I would totally wear this all the time.
I decided to add Color Club's Snowflakes, a flaky top coat, after that. I always had trouble finding the right color to go with Snowflakes, but I think I found a winner! I have it on now because I just didn't want to take it off my nails. It looks so cool in different lighting as well.
I never want to take this off, but in time I'll probably get sick of it (which is like a few days XD). But I'm loving this combination though!
What other colors have you paired with Color Club's Snowflakes?
Until next time!
This review was solely based on my honest opinion. I was not paid or asked to do this review for anyone.
I've been kind of lazy today. I didn't really do anything besides eat and sleep. I did watch some anime today on Hulu though. After this, I might watch some more episodes if new episodes are up of the ones I'm currently watching. Or I might choose a new one to watch. I've been dying to watch Bloodlad since it started streaming on Hulu, but I end up falling asleep. Oh well, we'll see.
Anyways, back to nails. Today I'm showing you Sinful Colors My Buoyfriend. This is a blue/purple (blurple?) creme polish. I swear I move my hands a little bit and it looks like a royal blue. It's more purple in my opinion, but point still remains. The formula was good, but it was a little thick for me. The color is very opaque and I almost wanted to do one coat, but I decided to do two coats to be safe. It's a really pretty color though. I would totally wear this all the time.
I decided to add Color Club's Snowflakes, a flaky top coat, after that. I always had trouble finding the right color to go with Snowflakes, but I think I found a winner! I have it on now because I just didn't want to take it off my nails. It looks so cool in different lighting as well.
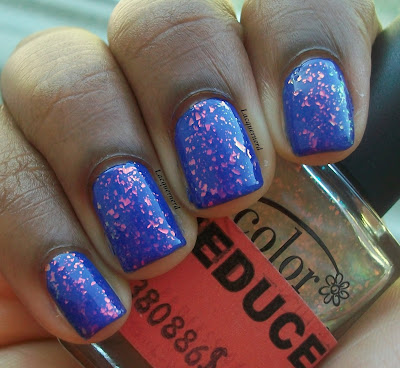 |
| In natural sunlight |
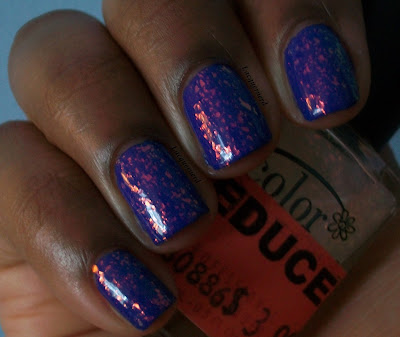 |
| Indoors with a little natural light |
I never want to take this off, but in time I'll probably get sick of it (which is like a few days XD). But I'm loving this combination though!
What other colors have you paired with Color Club's Snowflakes?
Until next time!
This review was solely based on my honest opinion. I was not paid or asked to do this review for anyone.
Thursday, August 15, 2013
Eyeball Kimono Nail Art
Hello everyone!
I have a unique, but simple design for you today. I love Japanese fashion, so I decided to create a design inspired by a kimono from a Kimono Fashion Show that I saw on Tokyofashion.com. Check out the link to see the actual design and photos from the show!
Colors Used:
Sinful Colors Pistache
Sinful Colors Energetic Red
Sinful Colors Sweet Nothing
Sinful Colors Black on Black
Sally Hansen Mellow Yellow
Sally Hansen Gray by Gray
Sally Hansen Cherry Cherry Bang Bang
Wet n Wild's French White Creme
The design was really simple to do. Everything was done with different sized dotting tools. I wish I did a better job with the flowers, but I'm pretty satisfied with them.
What do you think of this design? What kind of fashion inspires you?
Until next time!
I have a unique, but simple design for you today. I love Japanese fashion, so I decided to create a design inspired by a kimono from a Kimono Fashion Show that I saw on Tokyofashion.com. Check out the link to see the actual design and photos from the show!
Colors Used:
Sinful Colors Pistache
Sinful Colors Energetic Red
Sinful Colors Sweet Nothing
Sinful Colors Black on Black
Sally Hansen Mellow Yellow
Sally Hansen Gray by Gray
Sally Hansen Cherry Cherry Bang Bang
Wet n Wild's French White Creme
What do you think of this design? What kind of fashion inspires you?
Until next time!
Tuesday, August 13, 2013
Wet n Wild's Lemon Drop Swatch+Review
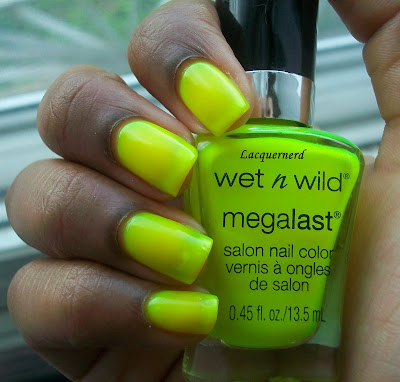
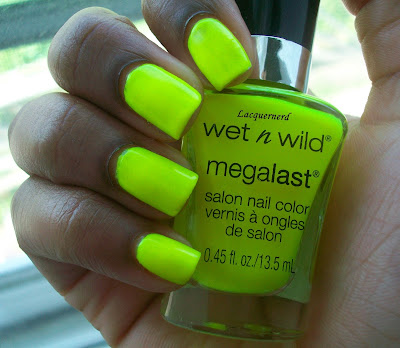
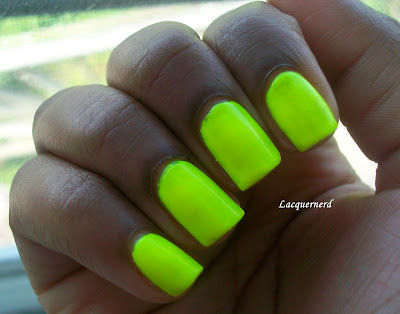
I have a swatch and review of Wet n Wild's Lemon Drop, and holy Batman it is bright! I usually don't go for bright colors like this, but it's actually not that bad. It's a perfect neon polish for the summer.
I bought this polish at Dollar General for $2 and it's also a part of the Megalast collection, which I found out while looking at some nail blogs that this is a Dollar General exclusive along with the 40+ shades that Wet n Wild added to the Megalast collection.
Lemon Drop is a sheer neon yellow. It literally reminds me of a yellow highlighter. The application was pretty good. As I mentioned before, the Megalast brushes are wide and flat, making it very easy to get the polish on.
Lemon Drop is a bit streaky when you first start putting the first couple coats on, but it starts to get a little better with the third coat. I didn't go past three coats, but I'm guessing if I added a fourth or fifth coat it would become less streaky.
I did two things with this polish. First, I did a swatch without a white base.
It looks less vibrant and streaky without the white base, but it still comes out a bright yellow. You can also see how sheer Lemon Drop really is. This is three coats and you can still see the nail underneath. If you're going to wear this sheer, it's going to take a lot of coats to get the opacity that you want.
Then, I put a white base (Wet n Wild's French White Creme) before putting on Lemon Drop.
With the white base, it was still streaky with three coats. You can kind of see it with the pointer finger where the streaks are. However, with the white base you can get the color more vibrant and opaque than if you were going to wear it by itself.
Overall, Lemon Drop is a pretty good neon yellow. I'm not sure if I'll be wearing this by itself anytime soon, but it's definitely a color that I would bust out if I'm feeling a little adventurous over the summer. If you're going to wear it, I would suggest starting with the white base first and then the color. Otherwise, you're going to be putting coat after coat after coat getting to its true color.
So what did you think of Lemon Drop? Do you think it's the perfect summer color?
Until next time!
This review was solely based on my honest opinion. I was not paid or asked to do this review for anyone.
Sunday, August 11, 2013
Gradient Leopard Print Nails
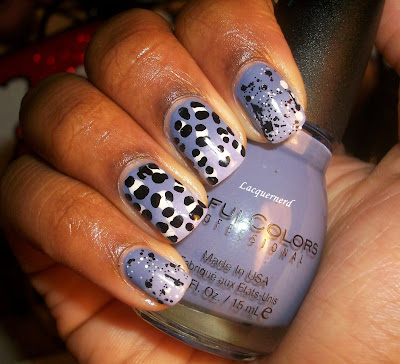
Double posting for the win! I added a little nail art to Sinful Colors Lavender. I haven't done leopard print in quite some time, but I think they came out okay. I just need a little more practice is all!
I did the middle and ring finger with the leopard print as the accent nails with Sinful Colors Lavender and Candy Coated. The leopard print is Wet n' Wild's French White Creme and Sinful Colors Black on Black. The rest of the fingers I topped with Hard Candy's Black Tie Optional.
I think I put too much polish with the black, but they don't look too bad. I love how with doing leopard print nails, you can kind of cover up your mistakes with it.
Until next time!
Sinful Colors Lavender Swatch+Review
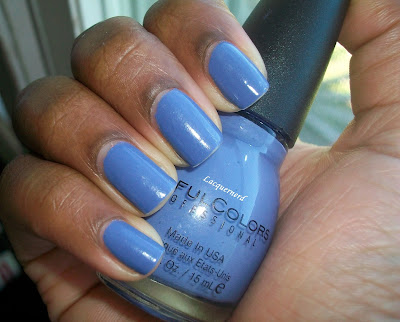
Hello everyone! I've had this color on for about a day already, but I still decided to post it on the blog.
I'm so glad I finally got my hands on this color! It's been on my wishlist forever. I bought this at Rite Aid for $1.99. I love how it's such a low price for a quality nail polish. I love a bargain! Let's get to the review!
Sinful Colors Lavender is a greyish purple creme. In certain lights, it reminds me of Color Club's Lavendarling since the purple comes out a little more in the light.
Overall, I would recommend buying this polish. It has a great formula and it's a beautiful color. I'll probably be using this one a lot!
So what do you think of Sinful Colors Lavender?
Until next time!
This review was solely based on my honest opinion. I was not paid or asked to do this review for anyone.
Thursday, August 8, 2013
Sinful Colors Island Coral
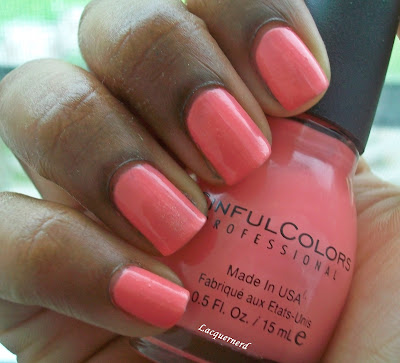
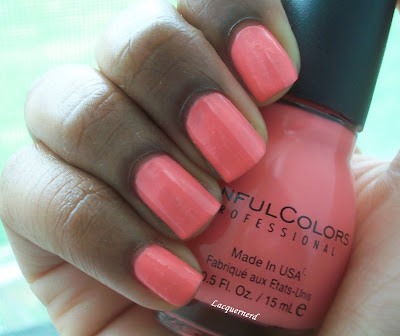
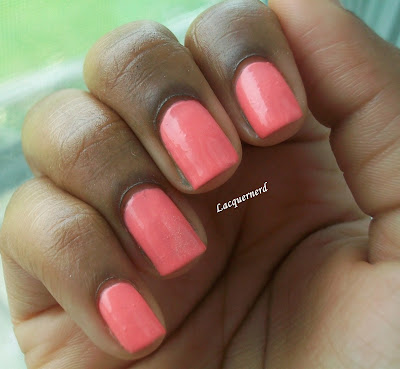
I think I have found a pink polish that I'm completely in love with, and I'm not much of a pink girl! This is Sinful Colors Island Coral that I purchased at Walgreens for $1.99.
Island Coral is a bright coral pink. It's a vibrant color and a perfect polish for the summer! I used two coats of polish and no top coat for this. The application and formula was pretty good, especially having a nice glossy finish without using a top coat. All in all, I'm loving this polish!
What do you think of Island Coral? Are you going to be picking up this shade for the summer, or do you have another summer favorite?
Until next time!
Wednesday, August 7, 2013
Sinful Colors Calypso Swatch+Review
I'm still trying to get the hang of posting on time, so bare with me for a bit. Luckily, I'll have some posts on queue for everyone for the next couple of days. Today, I have Sinful Colors Calypso on the blog.
I bought this polish at Walgreens on what looked like a new display of colors, but I wasn't really into the other colors, seeing as if they looked a little similar to other Sinful Color polishes. This one was the one that stuck out to me the most. I usually don't go for dark blues/greens like this, but after swatching it, I'm liking this color more and more.
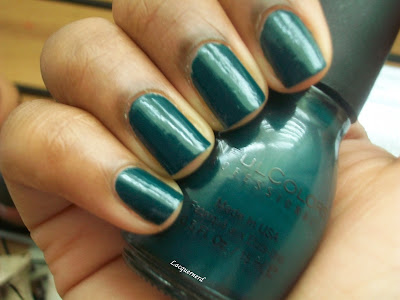
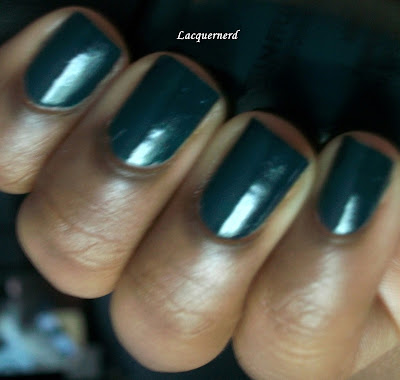
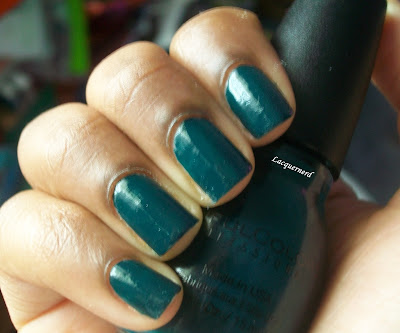
Calypso is a deep teal creme, and it's a one coater as well! Usually I do two coats, but I didn't need to for this color. The application was very smooth, but I did notice some of the brush hairs coming off. Other than that, it was a smooth application.
I also like how it doesn't look completely black. It really depends on what lighting you use or are under when you look at it, but the dark teal color is still distinguishable.
So what do you all think of Calypso?
Until next time!
This review was solely based on my honest opinion. I was not paid or asked to do this review for anyone.
Sunday, August 4, 2013
Wet n' Wild's I Need a Refresh-mint Swatch+Review
I've been waiting to to try this color out for the longest ever since I bought it a couple weeks ago. If you're looking for a dupe of China Glaze's For Audrey, this polish is the perfect solution. I purchased this polish for $2 at Dollar General, and I must say that it hasn't disappointed me yet! Let's get to the review!
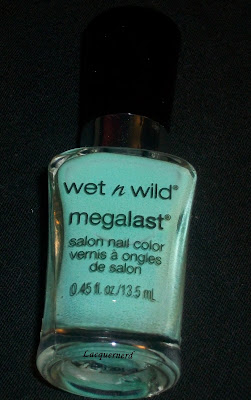
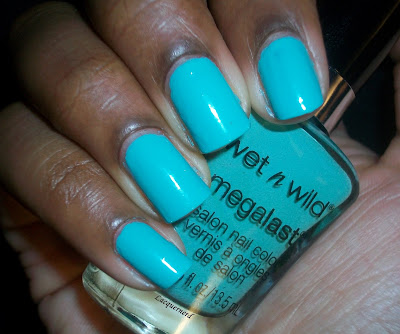
This color is a part of the Megalast Collection and it's called I Need a Refresh-Mint. It's a light turquoise/ light blue creme. My only downfall with this color is the fact that it's not really a mint color when on the nail, but in the bottle it has more of a mint color to it. It's more of a "minty blue" if I had to say. Nonetheless, it's still a pretty color.
I have some other colors in the Megalast Collection, and one of the things that I love about this brand is the wide and flat brush. The brush is very similar to the Sally Hansen Complete Salon Manicure brushes. With the wide brush, it was very easy for me to get the polish on in one or two swipes.
The polish was very opaque as well. I used two coats on my nails, but I could have gotten away with just one coat if I applied it a little thicker. The first coat was a little streaky, but nothing that the second coat couldn't fix.
All in all, I would recommend this color to anyone who is looking for a minty blue or a cheaper alternative to For Audrey. It's a nice polish for the price.
So, which one do you prefer: I Need a Refresh-Mint or For Audrey? What do you think of this polish?
Until next time!
This review was solely based on my honest opinion. I was not paid or asked to do this review for anyone.
This color is a part of the Megalast Collection and it's called I Need a Refresh-Mint. It's a light turquoise/ light blue creme. My only downfall with this color is the fact that it's not really a mint color when on the nail, but in the bottle it has more of a mint color to it. It's more of a "minty blue" if I had to say. Nonetheless, it's still a pretty color.
The polish was very opaque as well. I used two coats on my nails, but I could have gotten away with just one coat if I applied it a little thicker. The first coat was a little streaky, but nothing that the second coat couldn't fix.
 |
| No flash with artificial light |
 |
| With flash |
So, which one do you prefer: I Need a Refresh-Mint or For Audrey? What do you think of this polish?
Until next time!
This review was solely based on my honest opinion. I was not paid or asked to do this review for anyone.
Subscribe to:
Posts (Atom)
